Today was brilliant, in terms of a pottery day. The weather was even cooler and a bit rainy, so I was happy to be indoors, and the studio was a very comfortable temperature. I had come in on the weekend to finish up other pieces, so all I had left were the two large lantern type pieces.
I had pretty much finished up the windy house on the weekend, but I made a few finishing touches to it. My teacher asked about whether I would put a candle in it, or was I thinking lights... I wasn't thinking of lighting it at all, but I realized that if I ever wanted to burn a candle or tealight, I could insert the candle from the top, but it would be better if I had some "main floor" windows to insert the lighter through. So I added a couple more windows, and a few more birds. I toyed with the idea of adding a cat somewhere, but didn't. I am happy with how it turned out.
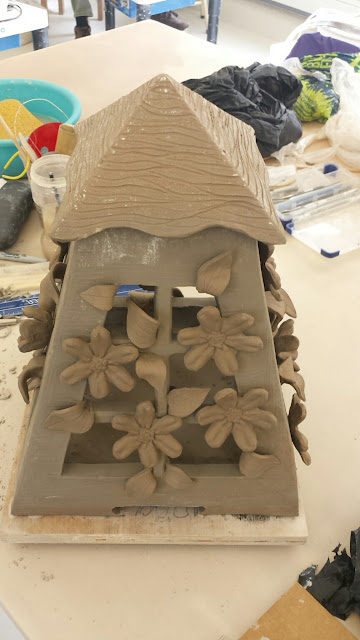
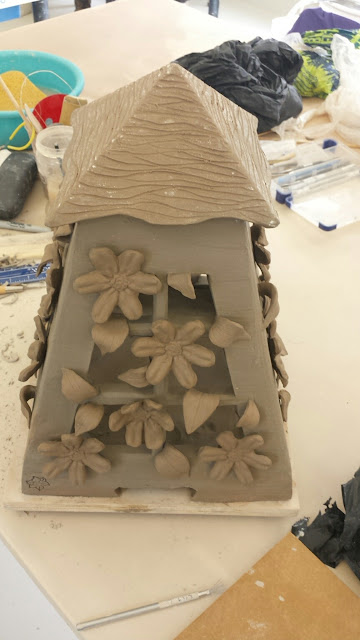
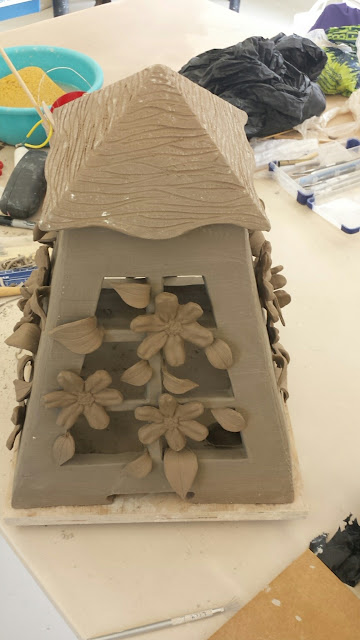
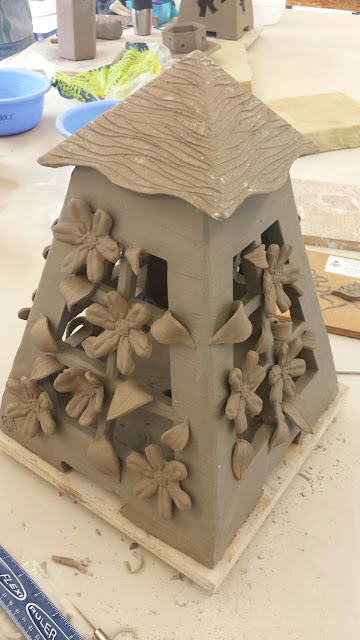
So then I spent most of the day on the big lantern, as I had planned. I made lots of clematis flowers and let them stiffen up while I planned how I'd cut out the trellis. I was really pleased with how my handmade mold performed. Here are the 4 sides of the lantern, once the trellis was carved, and flowers were attached :
As you can see, I tried to make each side different, with different numbers and positions of flowers, and made some just opening.
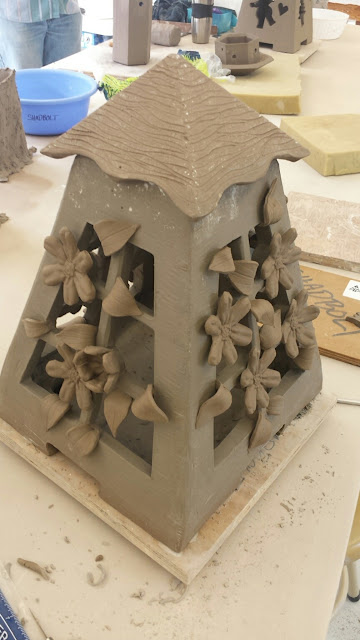
That was quite nice, but when I added the leaves, it changed the look dramatically, and lots of people commented to that effect. It gave it "movement" and "energy" and really filled in the trellis, making it look alive. Here it is again, from all four sides :
And here it is from the corners :
Not only did I add a hole previously, so an electrical cord could be pushed through the bottom, but my teacher encouraged me to add a hole in case I added a light kit, and made it into a sort of lamp. Of course, I could always put a candle or tealight inside also.
Funny, but I realized at that moment that this lantern / lamp may not actually make it into the garden, I think I will enjoy it enough that I will want to display it inside the house. My classmates were joking that I should put it on the kitchen table for display. I'm thinking more like the living room table. We'll see.
I finished this project with some time to spare, and then played a bit, but didn't really start anything new, since I won't be able to make it to class next week, and would worry about anything drying too much over 2 weeks. (Although at the last moment I tried something, but it is more of an experiment than a piece).
Since I had lots of firm pieces which I had cut out for the trellis, I decided to play a bit with carving some designs, to make stamps / sprig molds. I was a bit tired by the end of the day, so I only made a queen bee stamp, and a nautilus / snail shell stamp. I was proud of myself for tossing the remainder of the pieces into the trimmings bin for recycling. They were much too hard for me to fight with, and I decided I don't need to fully recycle the recycled clay, which this is. I am much more diligent / anal about keeping and reusing my scraps from the other fresh clays.
I also played with a rough looking planter / pot, experimenting with different textures. I am inspired by a few folks on Instagram who make beautiful rough pots, and I would like to make some also. But this one wasn't meant to be. I will need to experiment a bit more before I am happy with it. It looked to me too much like a children's attempt at a pot, rather than an intentional wabi sabi look. So again, I was proud of myself for crunching this one, although the clay was fresh, so I definitely kept it and will reuse it.



No comments:
Post a Comment